
Most people don’t really think about where vinegar comes from. It’s just… there. Sitting quietly on a kitchen shelf. Ready to drizzle over a salad or tackle stubborn water stains.
But the truth is, you can absolutely make it yourself at home—with ingredients you probably already have in your kitchen. And once you try it, it might just change the way you see vinegar forever.
There’s something oddly satisfying about turning leftover apples or plain sugar into something tangy, sharp, and genuinely useful. Sure, it takes time—it’s not as quick as whipping up banana bread or throwing together a pasta dish.
But it’s a laid-back, low-effort process—like sourdough’s more easygoing cousin. You set it up, leave it alone, and a few weeks later… voilà: homemade vinegar.
In this article, we’re going to talk about two types: apple cider vinegar and white vinegar. One is golden, fruity, and mellow; the other is clear, sharp, and basically a household superhero.
Whether you're looking to make your own pantry staples, cut down on plastic bottles, or just want a fun kitchen project to brag about, making vinegar at home is surprisingly addictive.
The Basics: What Even Is Vinegar, Really?
At its core, vinegar is nothing more than fermented acid. Not the scary kind, no bubbling potions here, but the type that comes from letting natural sugars break down into alcohol, and then into something tart and tangy.
The full process? It goes like this: sugar → alcohol → acetic acid. That final phase? That’s your vinegar.
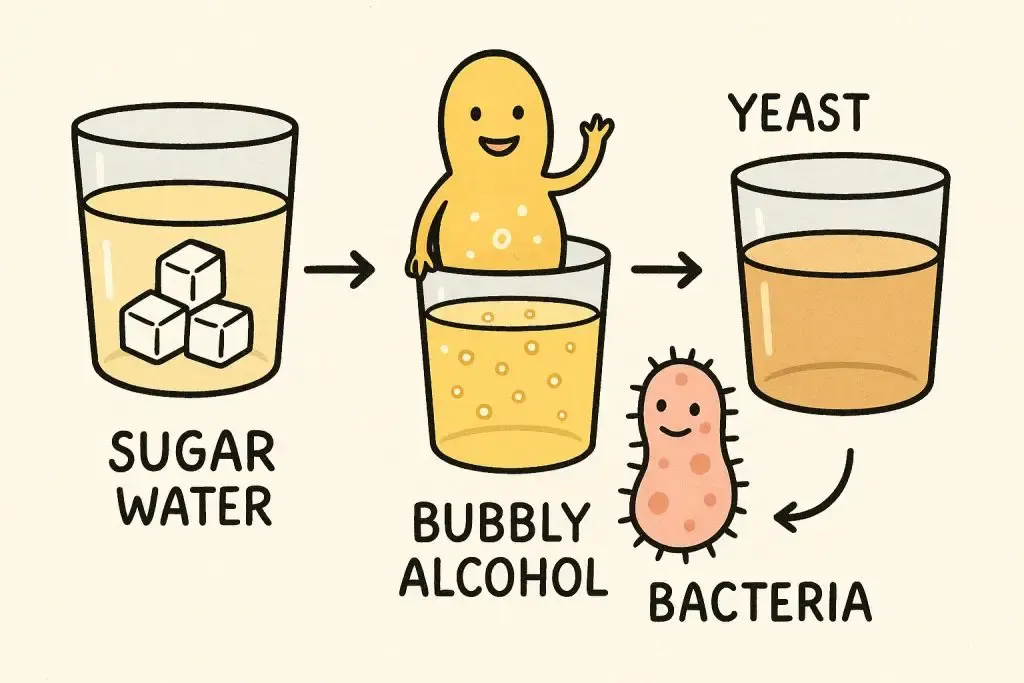
There are two key players here: yeast and acetic acid bacteria. Yeast (yep, the same stuff that makes bread rise) eats sugar and poops out alcohol.
Then the bacteria swoop in and transform that alcohol into vinegar. The whole thing is kind of like a relay race where microbes pass the baton.
Ever heard of “the mother” of vinegar? It sounds mystical, but it’s just a gooey blob of cellulose and friendly bacteria that shows up during fermentation.
If your vinegar starts growing cloudy strands or a jellyfish-like layer at the top, don’t freak out. That’s the mother. She’s a sign things are going right, not wrong.
Homemade vinegar usually ends up with around 5% acetic acid, which is strong enough for most recipes and cleaning jobs, though homemade white vinegar may be a little weaker than the sharp 6% store stuff.
Still, it works, and if you’re using it for flavor, not disinfection, it’s spot-on.
Apple Cider Vinegar: Where Apples Go to Get Better With Age
There’s something almost poetic about using apple scraps, peels, cores, and bruised fruit and turning them into something valuable.
Apple cider vinegar (ACV) feels like the most approachable vinegar to make at home. It’s forgiving, low-waste, and doesn’t ask for much besides time and patience.
You can start with whole apples or just the parts you’d normally toss in the compost.
In fact, the scraps from making applesauce or pie filling are perfect. If you’ve got kids, it’s a sneaky little science project.
If you’ve got a surplus of apples in the fall, it’s a delicious way to preserve the season. The flavor ends up subtly fruity and complex, with a bit of funk from the fermentation, but in a good way.
You can get two types of apple cider vinegar: raw (cloudy, with the mother) or filtered (clear and sharp).
Raw has all the beneficial bacteria, which some folks swear by for digestion or skin care. Filtered is better if you’re using it to clean windows or bleach whites.
The type of apples you use will shift the flavor. Tart green apples create a brighter vinegar, while red apples (like Fuji or Gala) lead to something sweeter and rounder.
Want to mix and match? Go for it. The blend makes it yours.
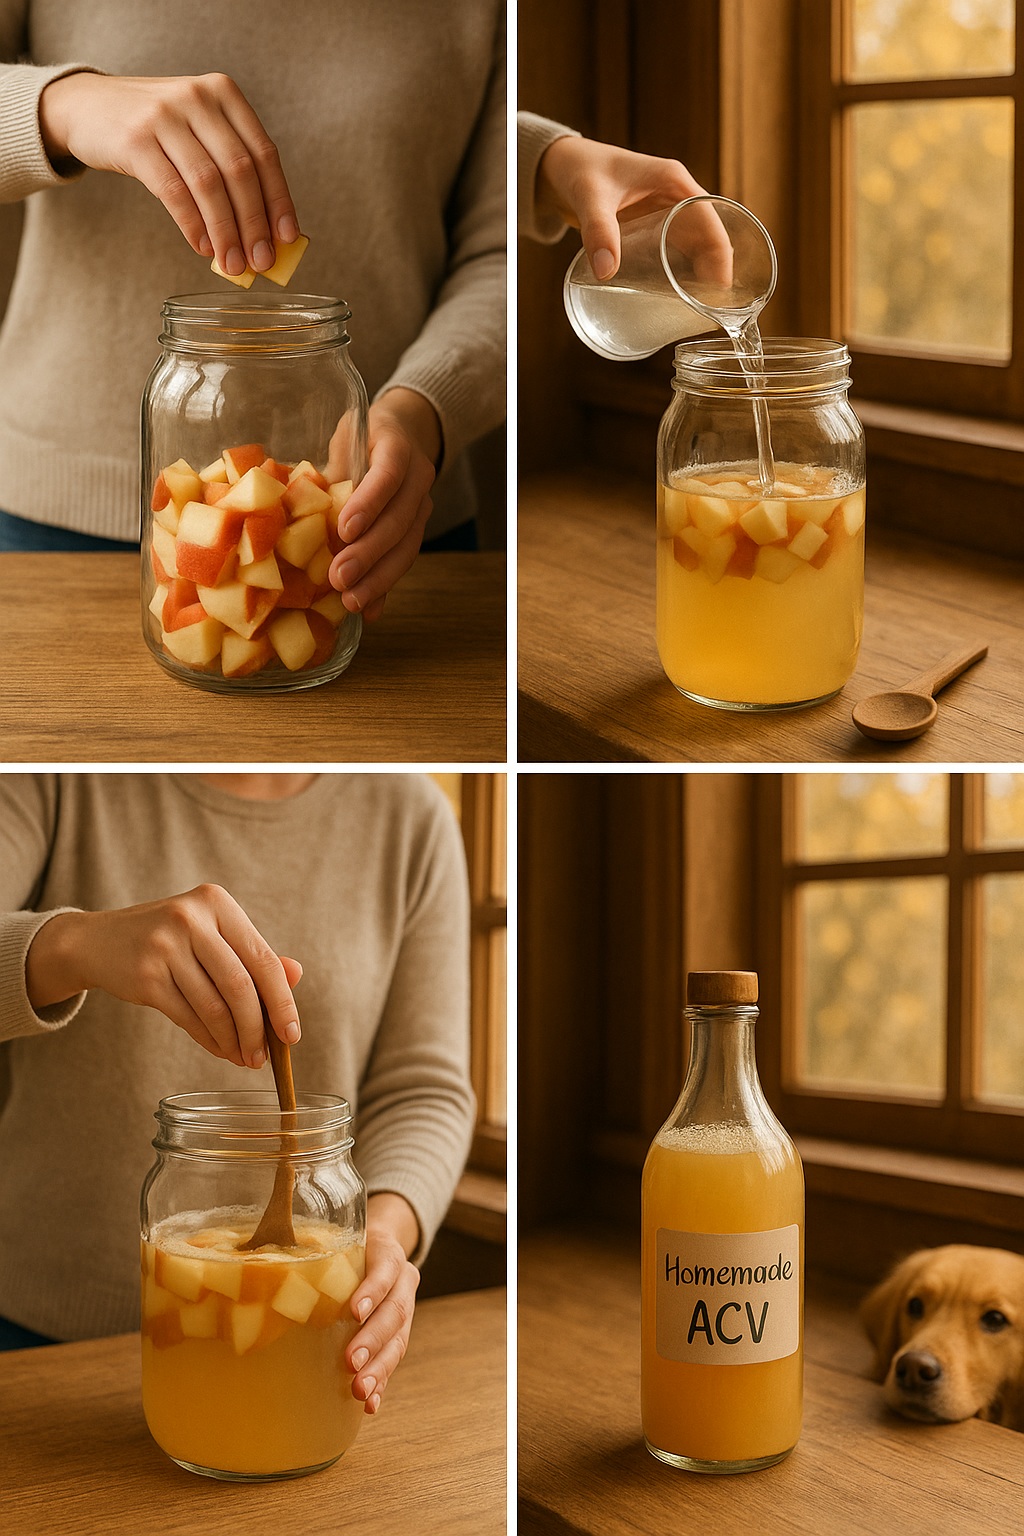
DIY Apple Cider Vinegar: Let’s Walk Through It Together
Here’s the fun part. Making apple cider vinegar isn’t just easy, it’s downright foolproof.
There are two main fermentation stages: the first is where apple sugars turn into alcohol (hello, hard cider), and the second is where the bacteria step in to turn that alcohol into vinegar.
What You’ll Need:
- 5–7 organic apples or apple scraps
- ¼ cup sugar (for every quart of water)
- Filtered or dechlorinated water
- A clean, wide-mouth glass jar
- Cheesecloth or coffee filter
- A rubber band
Start by chopping the apples or collecting scraps. You don’t have to peel or core them, just make sure they’re not moldy.
Dump them into your jar until it’s about three-quarters full. Dissolve sugar in filtered water and pour it over the apples, leaving about an inch of headspace at the top.
Cover the jar with cheesecloth and secure it with a rubber band. Let it sit in a warm, darkish spot (around 65–75°F works great).
Stir it once a day for the first couple of weeks. You’ll notice bubbles; that’s fermentation in action.
After two to three weeks, strain out the solids and pour the liquid back into the jar.
Now the bacteria take over. Leave it to sit, covered again, for another three to four weeks. Give it a sniff now and then.
When it smells like vinegar and tastes tangy, it’s ready. You can filter and bottle it, or keep it raw with the mother in.
White Vinegar: The Cleaner’s Favorite (And Sneaky Kitchen MVP)
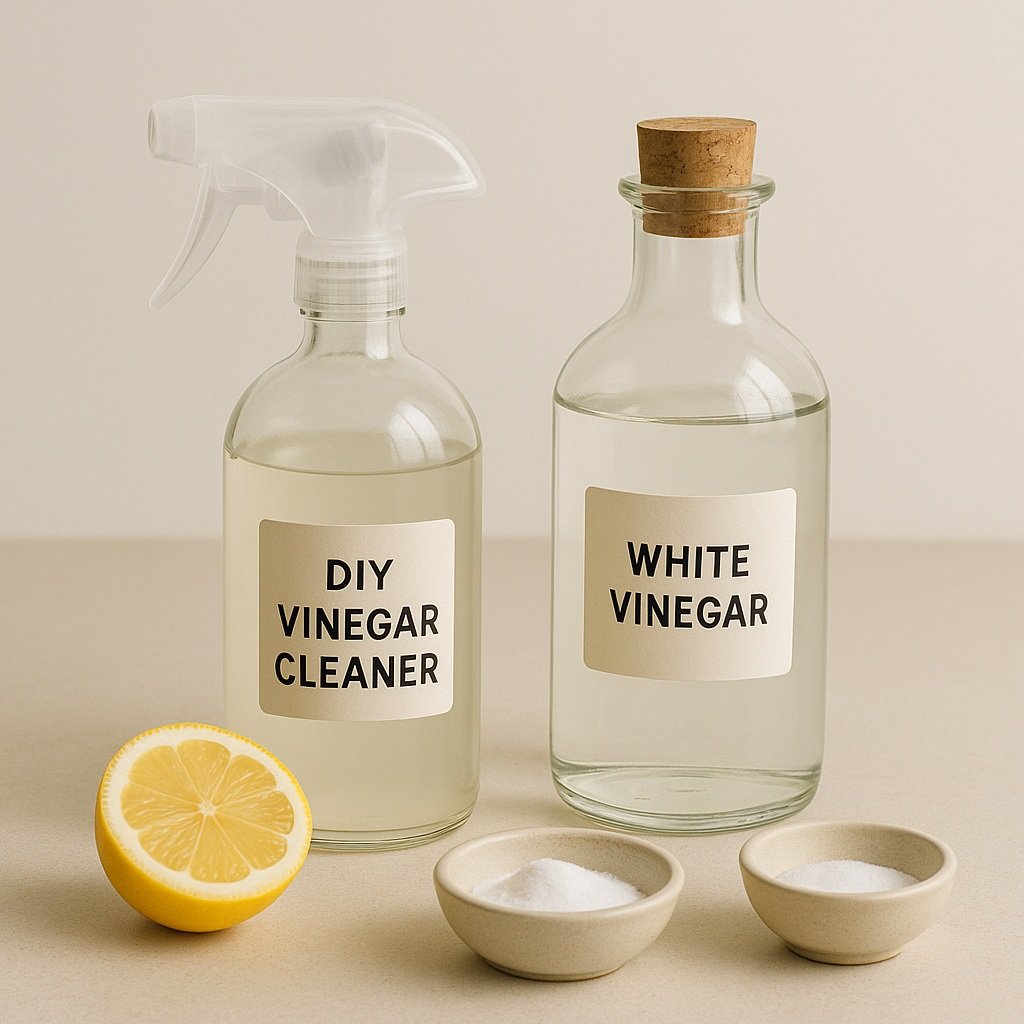
White vinegar has this reputation, it’s the no-nonsense, slightly boring cousin of apple cider vinegar.
The one you reach for when you’re scrubbing tile grout or deodorizing a stinky fridge. But don’t underestimate it.
It’s sharp, clean, and versatile as heck.
If apple cider vinegar is warm and rustic, white vinegar is clinical and cool. Think: lab coat, not flannel.
Now, let’s get honest, it’s a bit trickier to make at home. Most commercial white vinegar is brewed from diluted grain alcohol, often corn-derived ethanol, and then aggressively purified.
That’s how they get it so crystal-clear and consistent in strength.
But you can still make a homemade version. It’ll be a little cloudier, a little softer in acidity, and sometimes with a slight sweet note, depending on what sugar you start with.
Most home brewers use either sugar water or diluted vodka as a base. Yep, vodka. Add in some friendly bacteria, and you’re golden.
What makes white vinegar extra lovable is how multipurpose it is. One bottle can go from pickling red onions to degreasing your stove to making your laundry fresher.
Honestly, it’s like having a Swiss Army knife in a jar.
Making White Vinegar: A Little Chemistry, A Lot of Waiting
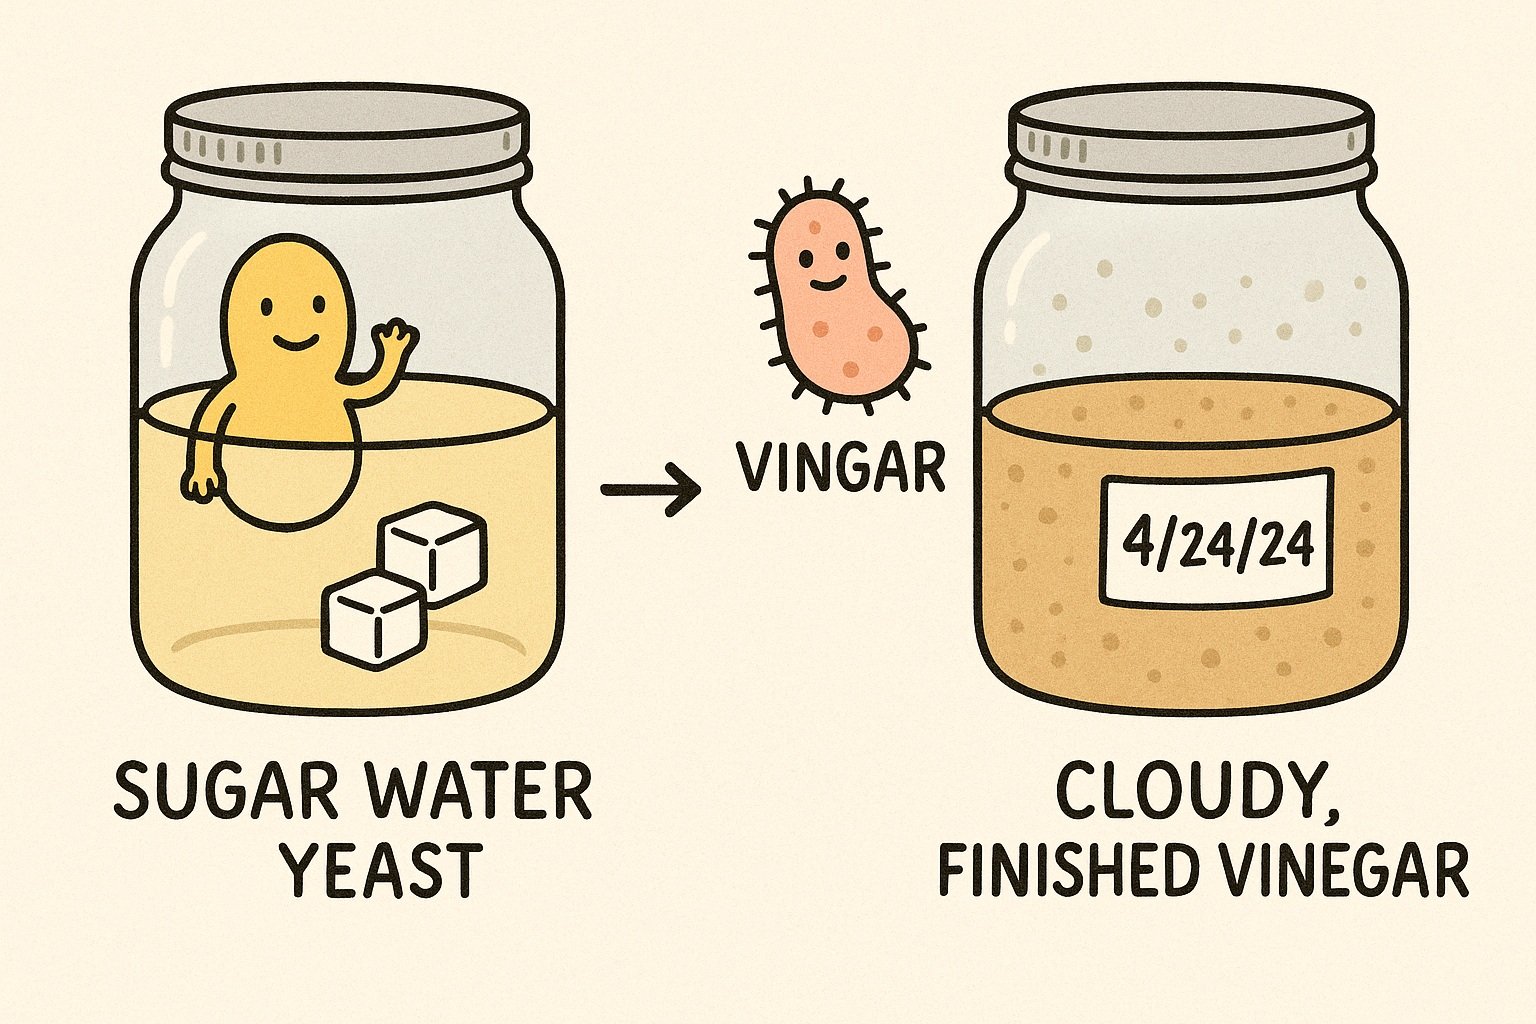
Alright, time to get a little science-y, but stay with me, this part’s actually kind of fun. Making white vinegar is like playing the long game.
You’re taking something sugary or alcoholic and nudging it through two transformations. First: fermentation to alcohol. Then: oxidation to vinegar. It’s a microbial marathon, not a sprint.
What You’ll Need:
- 1 cup sugar (or 1 cup vodka or other neutral alcohol)
- 1 quart filtered water (if using sugar)
- A packet of baker’s yeast (optional, if you’re starting with sugar)
- ½ cup unpasteurized vinegar (for the mother)
- A large glass jar or crock
- Cheesecloth or paper towel
- Rubber band
If you’re starting with sugar, dissolve it in warm water and let it cool.
Add yeast if you want to speed up the alcohol phase, though natural yeast in the air might do the job too.
Cover the jar and leave it in a warm spot for a week or two, stirring daily. You’ll start smelling that faint boozy scent.
Once it smells like weak wine or cider, add in your unpasteurized vinegar to kickstart the acetic fermentation.
Cover it again (always breathable, no lids!), and let it sit for another 3 to 4 weeks. You’ll start seeing the mother form. It’s like a jellyfish that floats or clings to the bottom, totally normal.
After about a month, start tasting. If it stings your nose and puckers your tongue, you’ve got vinegar.
What to Expect While It’s Fermenting (Smells, Bubbles, the Whole Show)
Here’s the real talk: fermentation gets weird. Sometimes it smells like apples and fresh cider. Sometimes it smells like a frat house the morning after a party.
And sometimes, nothing much happens, at least not at first.
The first couple of weeks, if you’re using sugar water, you’ll notice bubbles forming at the surface. That’s the yeast doing its thing, breaking down sugar and turning it into alcohol.
It’s exciting, in a low-key biological kind of way.
Then comes the quiet stretch. Once the acetic acid bacteria kick in, they tend to work silently.
You might not see bubbles anymore, but if a mother starts forming or the liquid begins to cloud slightly, that’s your clue. It’s working.
Don’t worry if things look a little funky. A thin white film on top? Probably kahm yeast, harmless.
A gelatinous blob? That’s the mother. If you see black or fuzzy mold, though, toss it and start over. It’s rare, especially if everything’s clean, but it can happen.
Give it a sniff every week. If it starts to smell like vinegar, you’re close. If it still smells like cider or beer, it needs more time. Taste-testing is your best guide.
When It’s Ready: Taste Testing, Filtering, and Bottling Like a Pro
You’ll know when it’s ready, your nose will tell you. Vinegar has that unmistakable tangy aroma.
It hits you right at the back of the throat, doesn’t it? If it smells sharp, tastes sour (with no trace of alcohol), and makes your jaw clench just a bit, congrats, it’s done.
Grab a clean spoon and take a tiny sip. If it’s too mild, give it another week or two. Some batches take four weeks; others stretch out to six or more, depending on your room temperature and how active your starter was.
Once it’s just right, it’s time to strain. Line a funnel with cheesecloth or use a fine mesh strainer to remove the mother and any sediment.
Some folks keep the mother alive to start their next batch. Others pop it into the compost. Either way, it served its purpose.
Sterilize your bottles, boil them if you want to be safe, and fill them up. Label them with the date and type. Homemade vinegar doesn’t expire exactly, but it can mellow over time.
Store it somewhere cool and dark, and it’ll last indefinitely.
This is the part where it all feels real, bottling it up, corking it, writing your name on the label like you’re some kind of tiny-batch artisan vinegar wizard.
Bonus Uses: What To Do With Your Homemade Vinegar
Once you’ve made your own vinegar, you’ll start noticing just how often you reach for it.
It’s not just for cooking, though a splash in a salad dressing or quick pickle brine is always a win. It’s the kind of ingredient that sneaks into everything.
In the kitchen? Add it to marinades for a little zip. Mix with olive oil, honey, and mustard for a rustic vinaigrette.
Deglaze pans. Brighten up soups.
If you made apple cider vinegar, try it as a tangy twist in coleslaw or barbecue sauce. If it’s white vinegar, use it to make spicy refrigerator pickles.
But the real magic? Around the house. White vinegar is a natural deodorizer, fabric softener, glass cleaner, drain unclogger, fruit rinse, you name it.
Mix it with water in a spray bottle and clean just about everything (except marble, granite, and wood finishes, it’s too acidic for those).
Apple cider vinegar pulls double duty in the wellness department. Some people use it as a hair rinse for shine, a skin toner, or even a pet-friendly flea rinse.
It’s not a miracle cure, but it’s versatile and safe, especially when you’ve made it yourself and know exactly what’s in it.
Troubleshooting, FAQs, and “Wait, Did I Ruin It?” Moments
Let’s be real: fermentation can be unpredictable. It’s mostly easy, but every now and then, something just feels… off. So let’s walk through the weird stuff, before you throw out a perfectly good batch out of fear.
My vinegar smells like alcohol, not vinegar.
That’s
normal in the early weeks. It means you’re still in the alcohol stage.
Give it time. You might need to stir more or make sure it’s not sealed
too tightly, oxygen is what helps turn alcohol into vinegar.
There’s weird stuff floating on top.
If it’s
white and thin, you’re probably looking at kahm yeast. It’s harmless,
skim it off and carry on. If it’s fuzzy, black, or green? That’s mold.
Pitch the batch and sanitize everything.
It’s too weak or watery.
This
can happen if your sugar content was too low at the start, or if your
fermentation got cut short. Next time, use more apple scraps or sugar,
and let it ferment longer. You can even “back blend” with a bit of
stronger vinegar to punch it up.
Can I mix different vinegars or reuse the mother?
Totally.
The mother from apple cider vinegar can kickstart white vinegar, and
vice versa. The bacteria aren’t picky, as long as they get alcohol and
some air, they’ll do their thing.
Making vinegar isn’t a test you can fail. The worst that usually happens is it takes longer than expected. As long as you trust your senses (look, smell, taste), you’ll be fine.
Wrapping It Up: Homemade Vinegar is More Than a Kitchen Project
There’s something unexplainably comforting about these kinds of projects. The ones that move at their own pace. That doesn’t require perfection or timers, or exact measurements.
Making vinegar slows you down just enough to notice what’s around you, apple peels curling in the compost bowl, the soft bubble of fermentation, the quiet ritual of daily stirring.
It might sound like a stretch, but there’s a kind of intimacy in it. You’re nurturing something alive. You’re watching it transform, week by week, into something sharper, bolder, more useful. That alone is worth a second look.
And here’s the thing: once you bottle that first batch, it doesn’t stop. You’ll want to give it away.
Write cute labels. Save the mother. Try different fruits. Maybe it’ll be plum vinegar next time. Or peach. Or pear.
It’s not just about vinegar, it’s about making something with your own hands, from what you have, and watching it become something more.